How to Install Rabby Wallet for Crypto Donations
A streamer-friendly guide to safely install Rabby Wallet, create or import a wallet, back up the recovery phrase, and prepare an address for USDT/crypto donations.
What you will have after setup
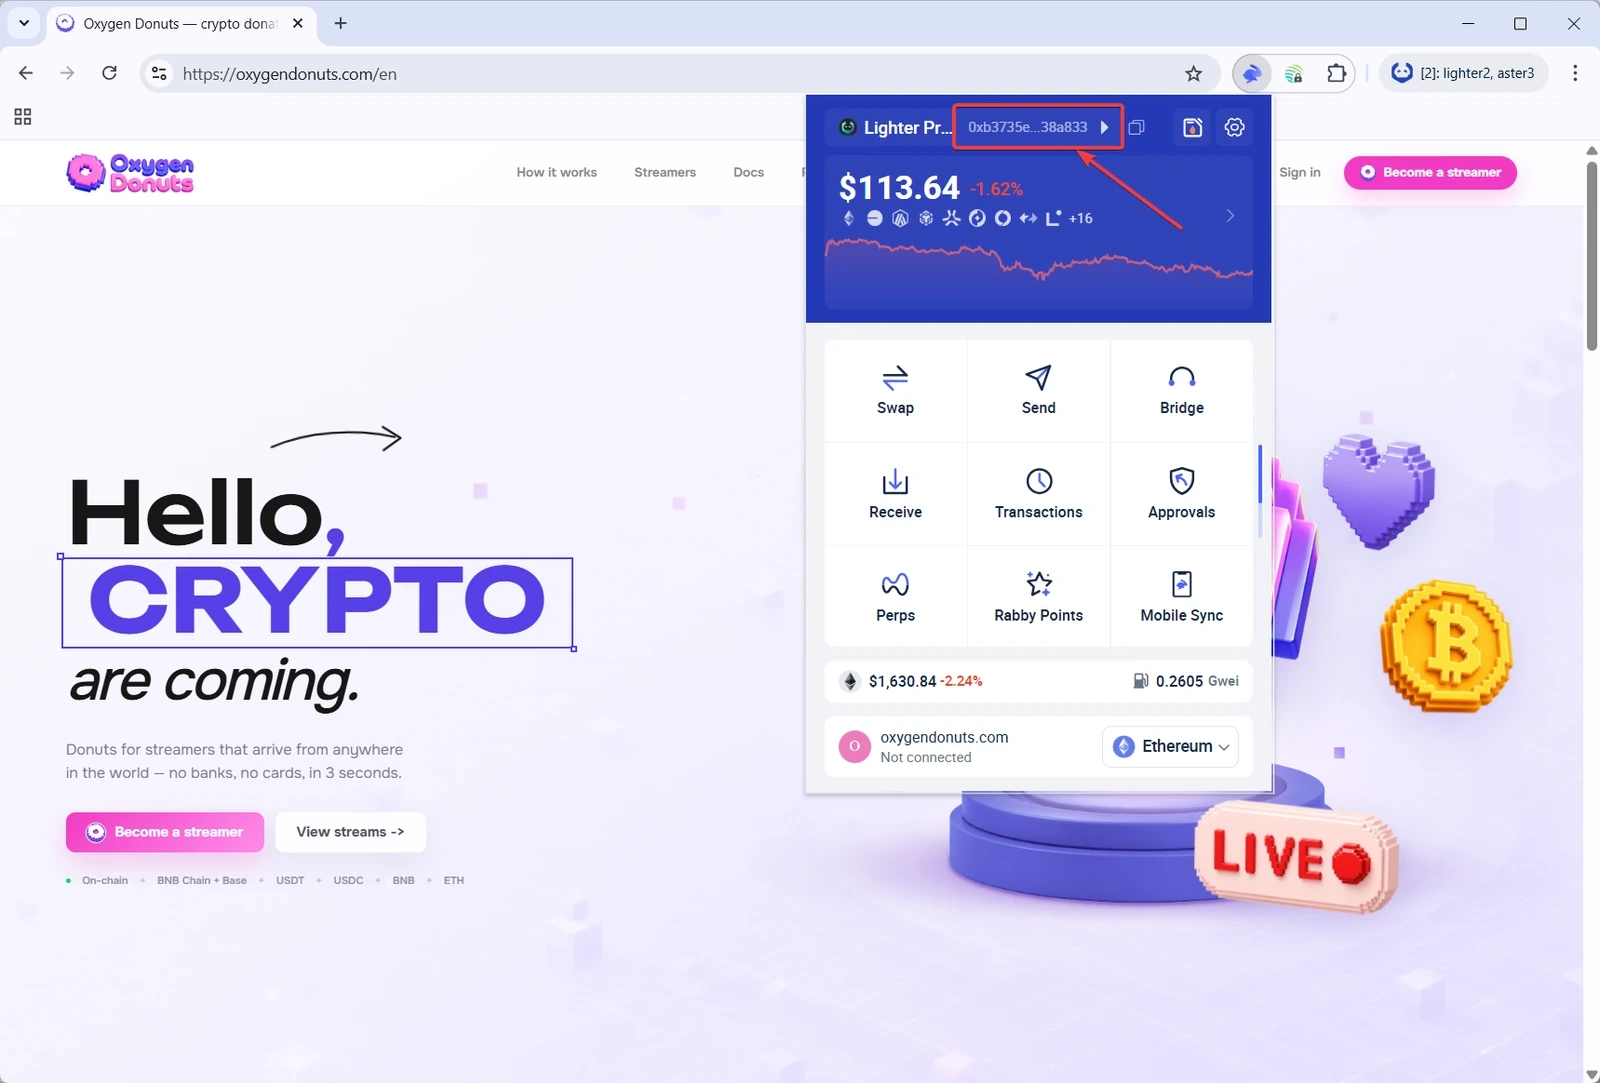
After setup, you will have a browser-based EVM wallet that you can use to receive crypto donations, check incoming transfers, and connect to services like Oxygen Donuts. For a streamer, this is the basic wallet step before accepting USDT or other crypto on stream.
Why Rabby works well for streamers
Rabby Wallet is an open-source browser wallet for Ethereum and EVM networks. For crypto donations, that is useful because many USDT transfers and EVM networks use the same address format, while the wallet shows transaction details before you sign.
What matters for donations
- 1EVM networks
Rabby is built for Ethereum and the EVM ecosystem. This fits donation scenarios where USDT or another crypto asset arrives on a supported EVM network.
- 2Review before signing
Before you approve an action, Rabby shows the expected balance change. That helps you avoid signing confusing or suspicious actions.
- 3One wallet across networks
For a streamer, this reduces confusion: you do not need to manually think about network switching every time if the service handles the target EVM network.
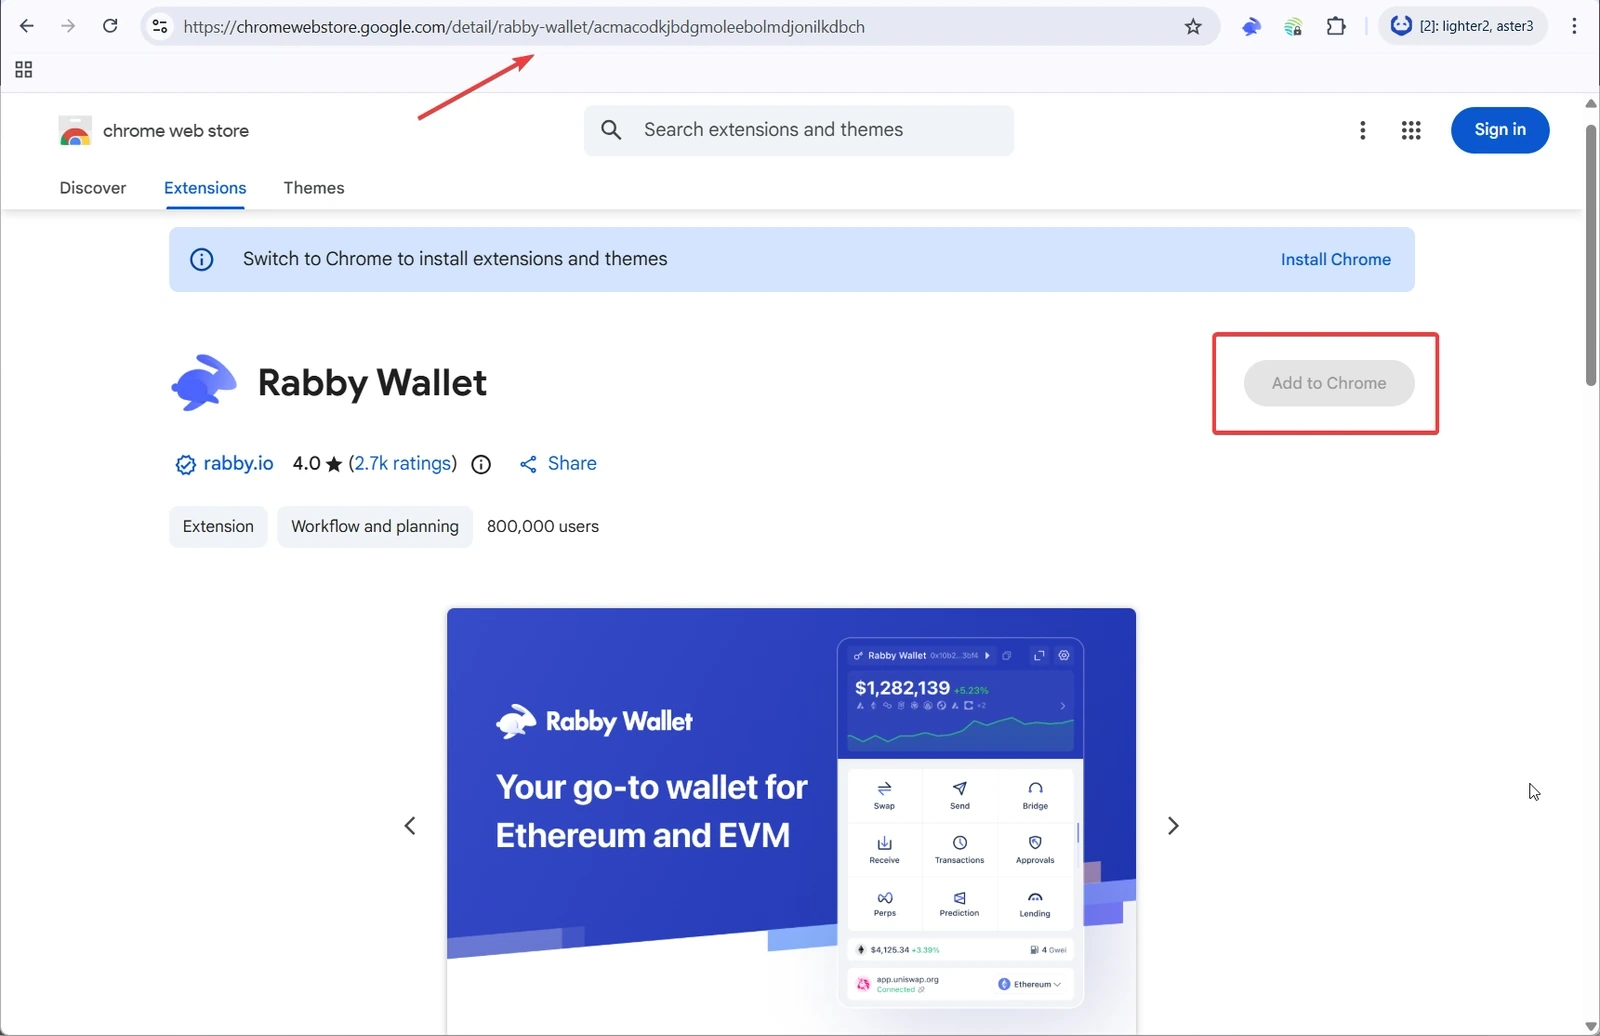
Step 1. Open Rabby in Chrome Web Store
Open the Rabby Wallet page in Chrome Web Store and check the extension name, page URL, and publisher. This matters for wallets: fake extensions can look almost identical but steal your seed phrase or replace an address.
Step 2. Install and pin the extension
Chrome installation
- 1Click Add to Chrome
Chrome will show a confirmation window for the extension install. Check that you are installing Rabby Wallet.
- 2Confirm installation
After installation, the Rabby icon will appear in the browser extensions list.
- 3Pin Rabby
Open the Chrome extensions menu and pin Rabby to the toolbar. This makes it easier to open the wallet while setting up donations.
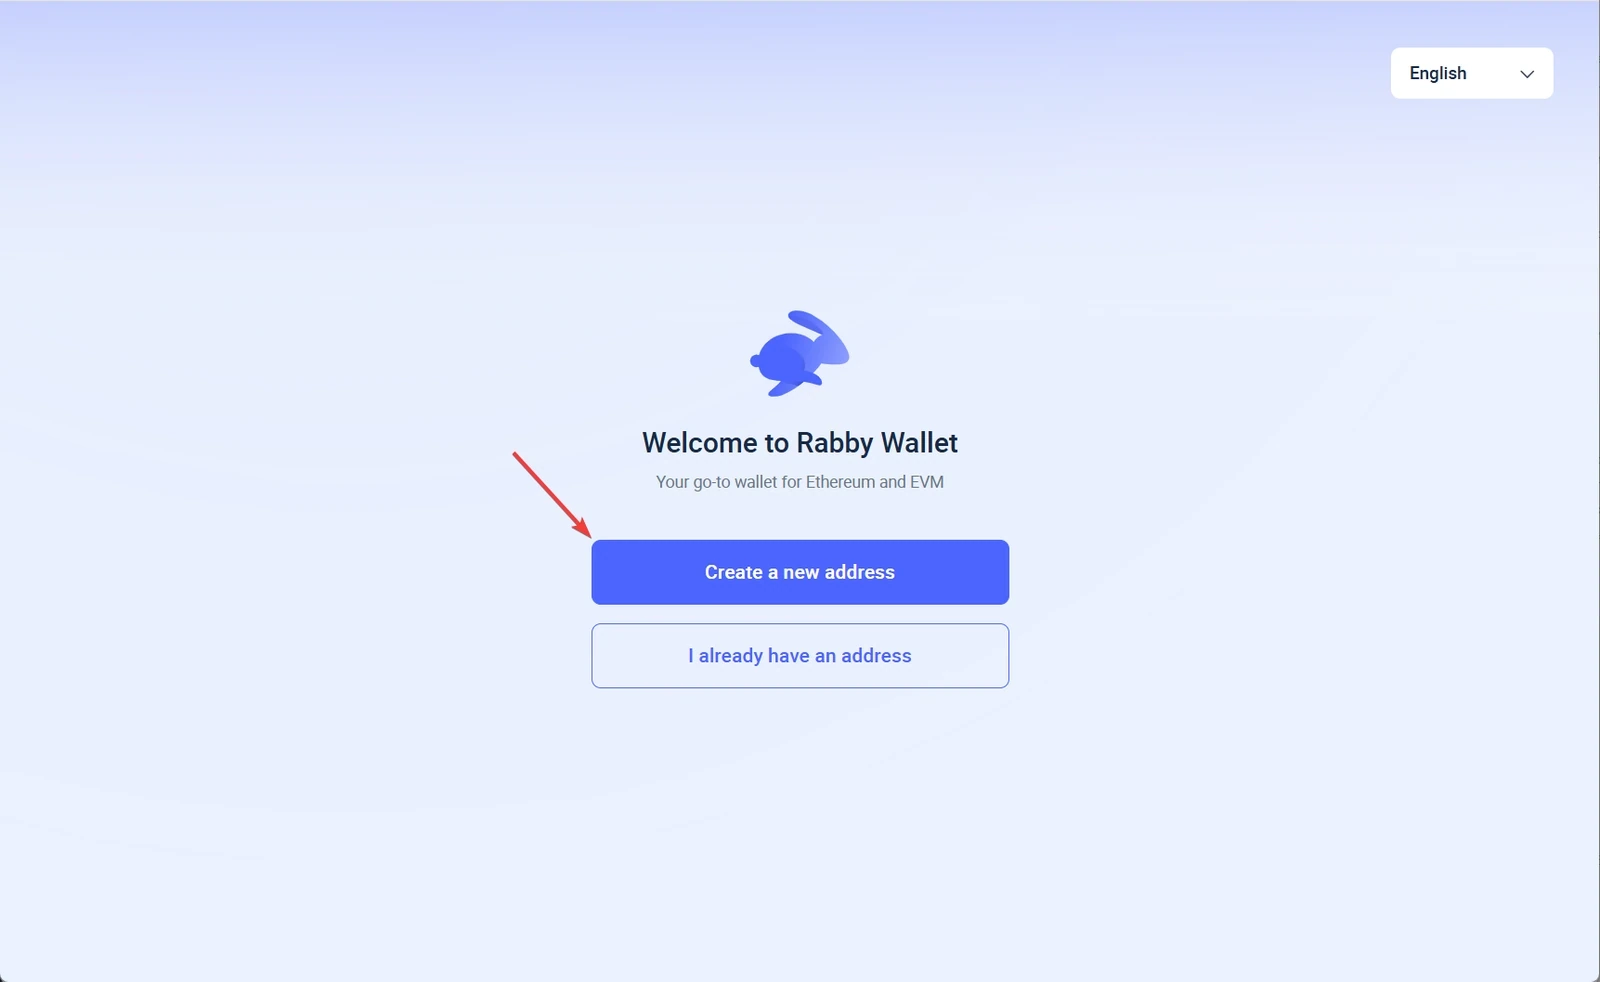
Step 3. Create a new wallet or import an existing one
If you already have an EVM wallet, you can import it into Rabby. If you do not have a separate wallet for donations yet, it is usually cleaner to create a new one so you do not mix personal funds, tests, and stream donations.
First Rabby launch
- 1Choose create or import
Create is best for a new donation wallet. Import is for moving an existing EVM wallet into Rabby.
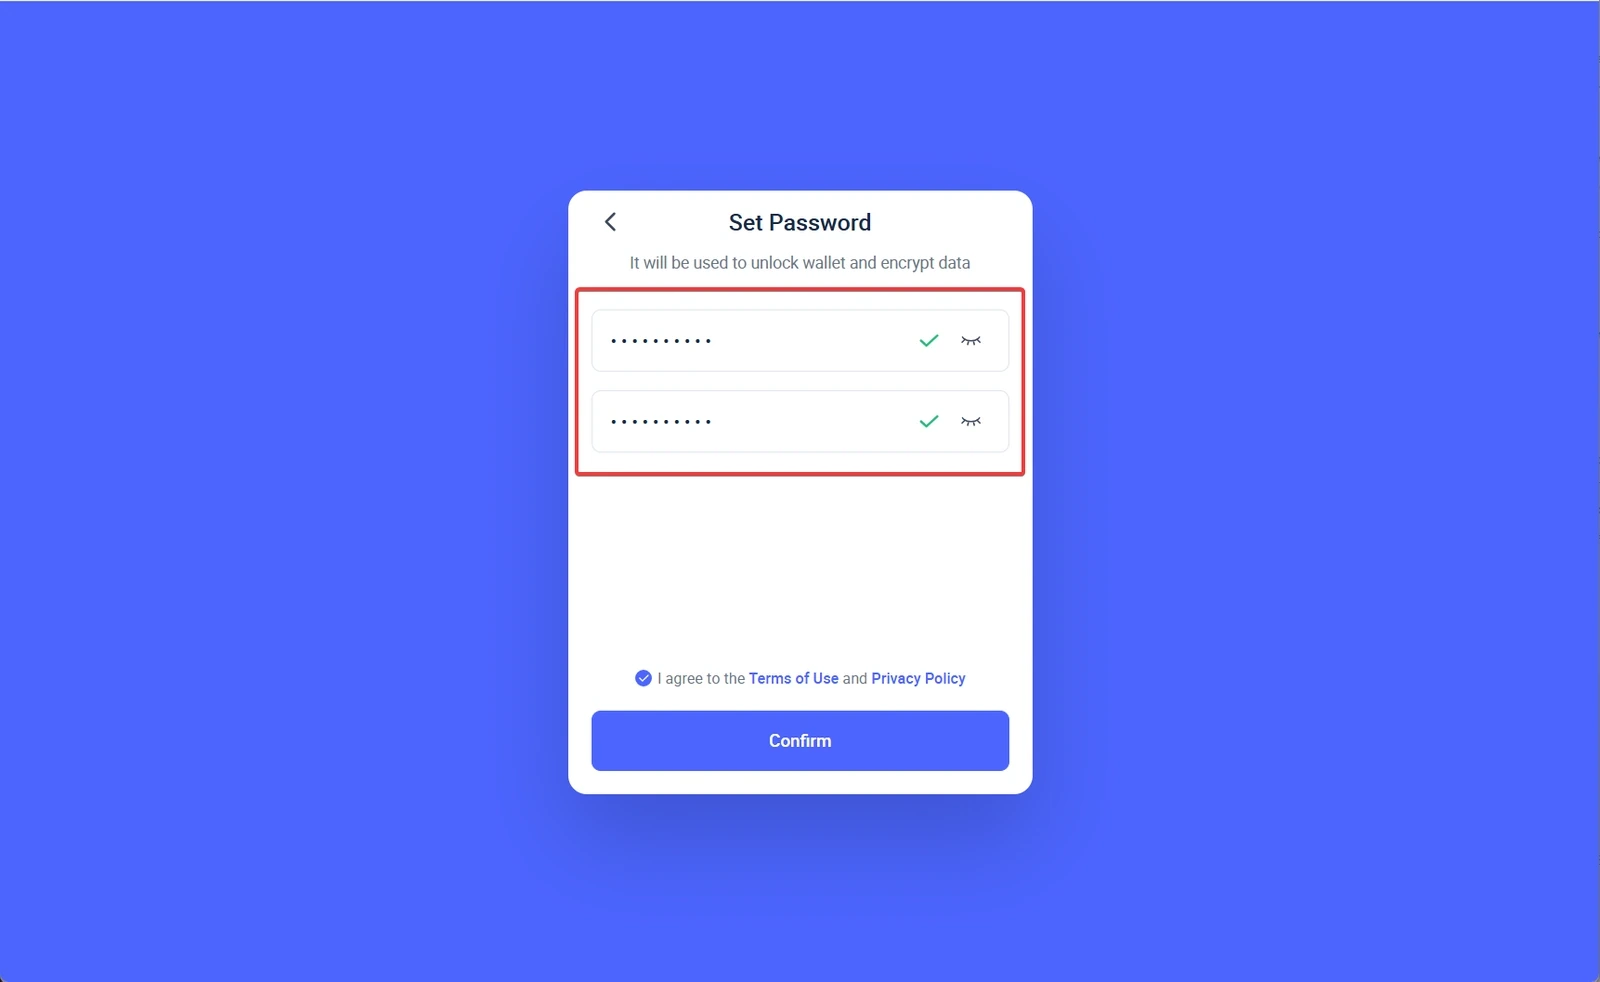
- 2Set a separate password
The password protects the extension on this computer, but it does not replace the recovery phrase.
- 3Back up the recovery phrase
Write the phrase down offline and check that you can restore the wallet. Without it, you cannot recover access if you lose the computer.
Step 4. Store the recovery phrase offline
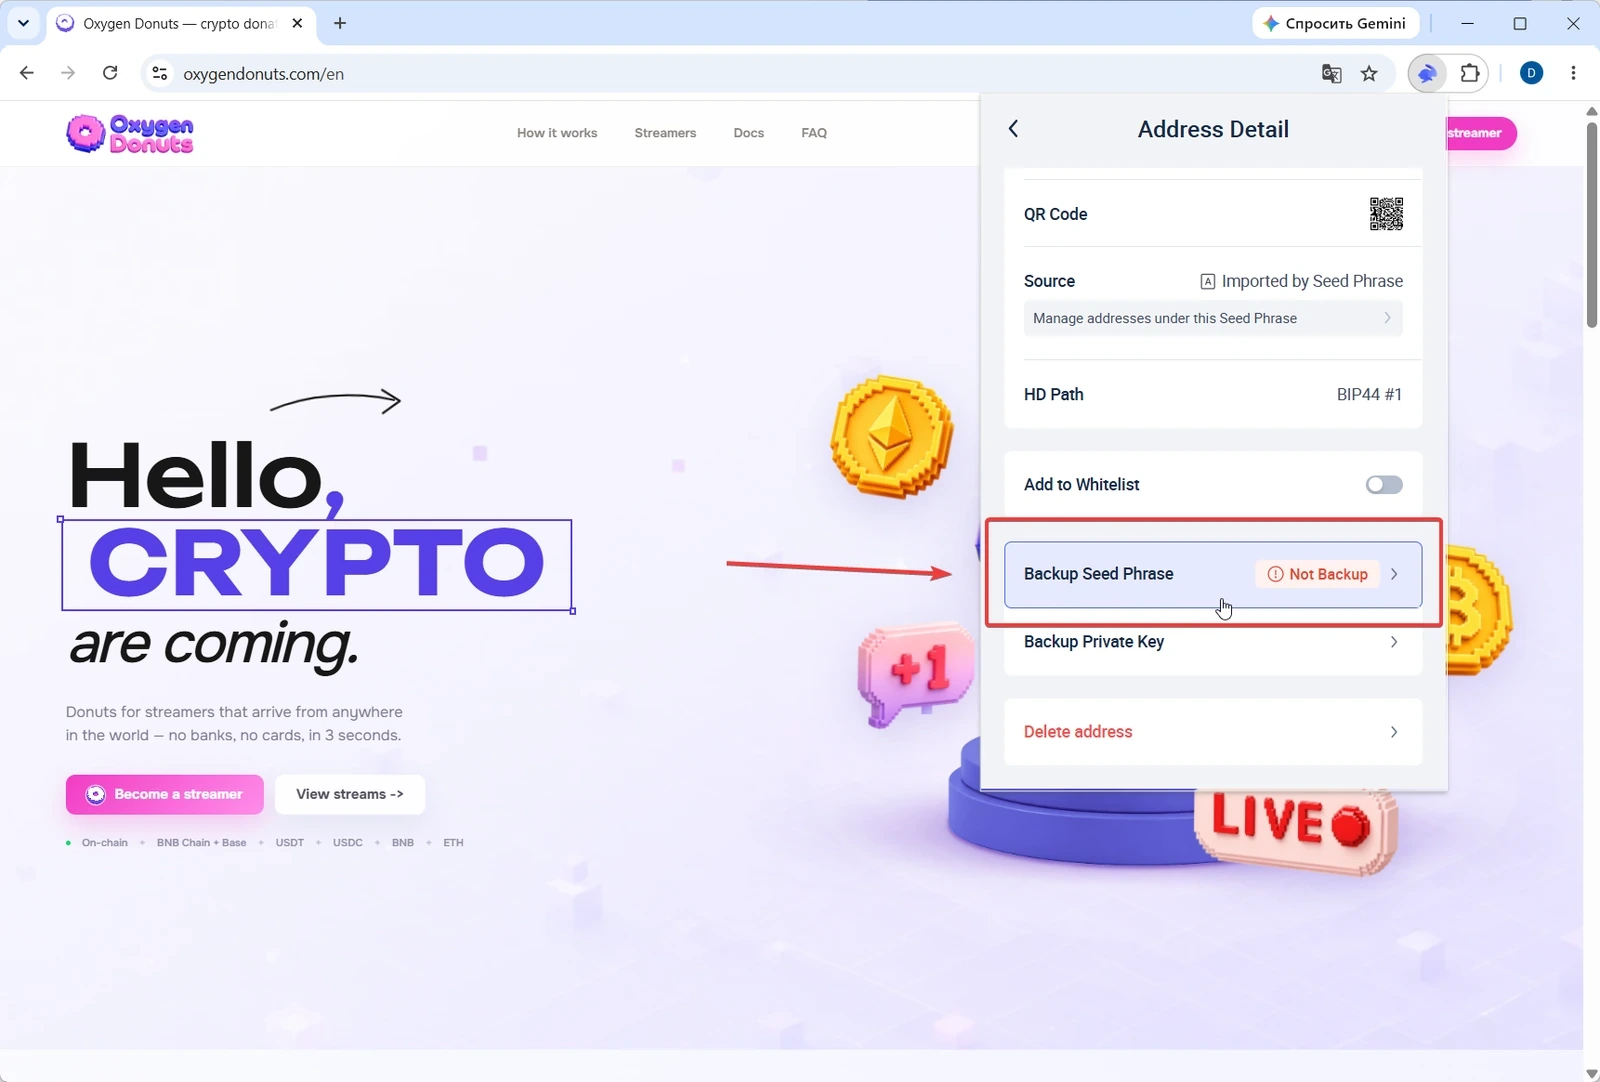
A donation wallet should be convenient, but it should not be fragile. The basic safe minimum is to write the recovery phrase on paper, store it away from the computer, and avoid keeping the only copy next to your streaming setup.
Minimum backup
- 1Write the phrase by hand
Do not take a photo of the screen or copy the phrase to the clipboard unless absolutely necessary.
- 2Create a second copy
If one copy is lost, you should have a backup.
- 3Test recovery
Before receiving larger amounts, make sure the restored wallet address matches.
Step 5. Copy your wallet address
On EVM networks, the address usually starts with 0x. You can use this address to receive donations on a supported network. After copying it, check the first and last characters, especially when pasting it into a service setting.
Step 6. Prepare the network and a test transfer
Before the first donation
- 1Choose a supported network
The network in the wallet, the donation service, and the network used by the viewer to send USDT must match.
- 2Send a small test
Before going live, send a small amount or ask for a test transfer to confirm the address, network, and donation display.
- 3Check the incoming transfer
Open Rabby and confirm that the balance changed. If you use alerts, test them before the stream starts.
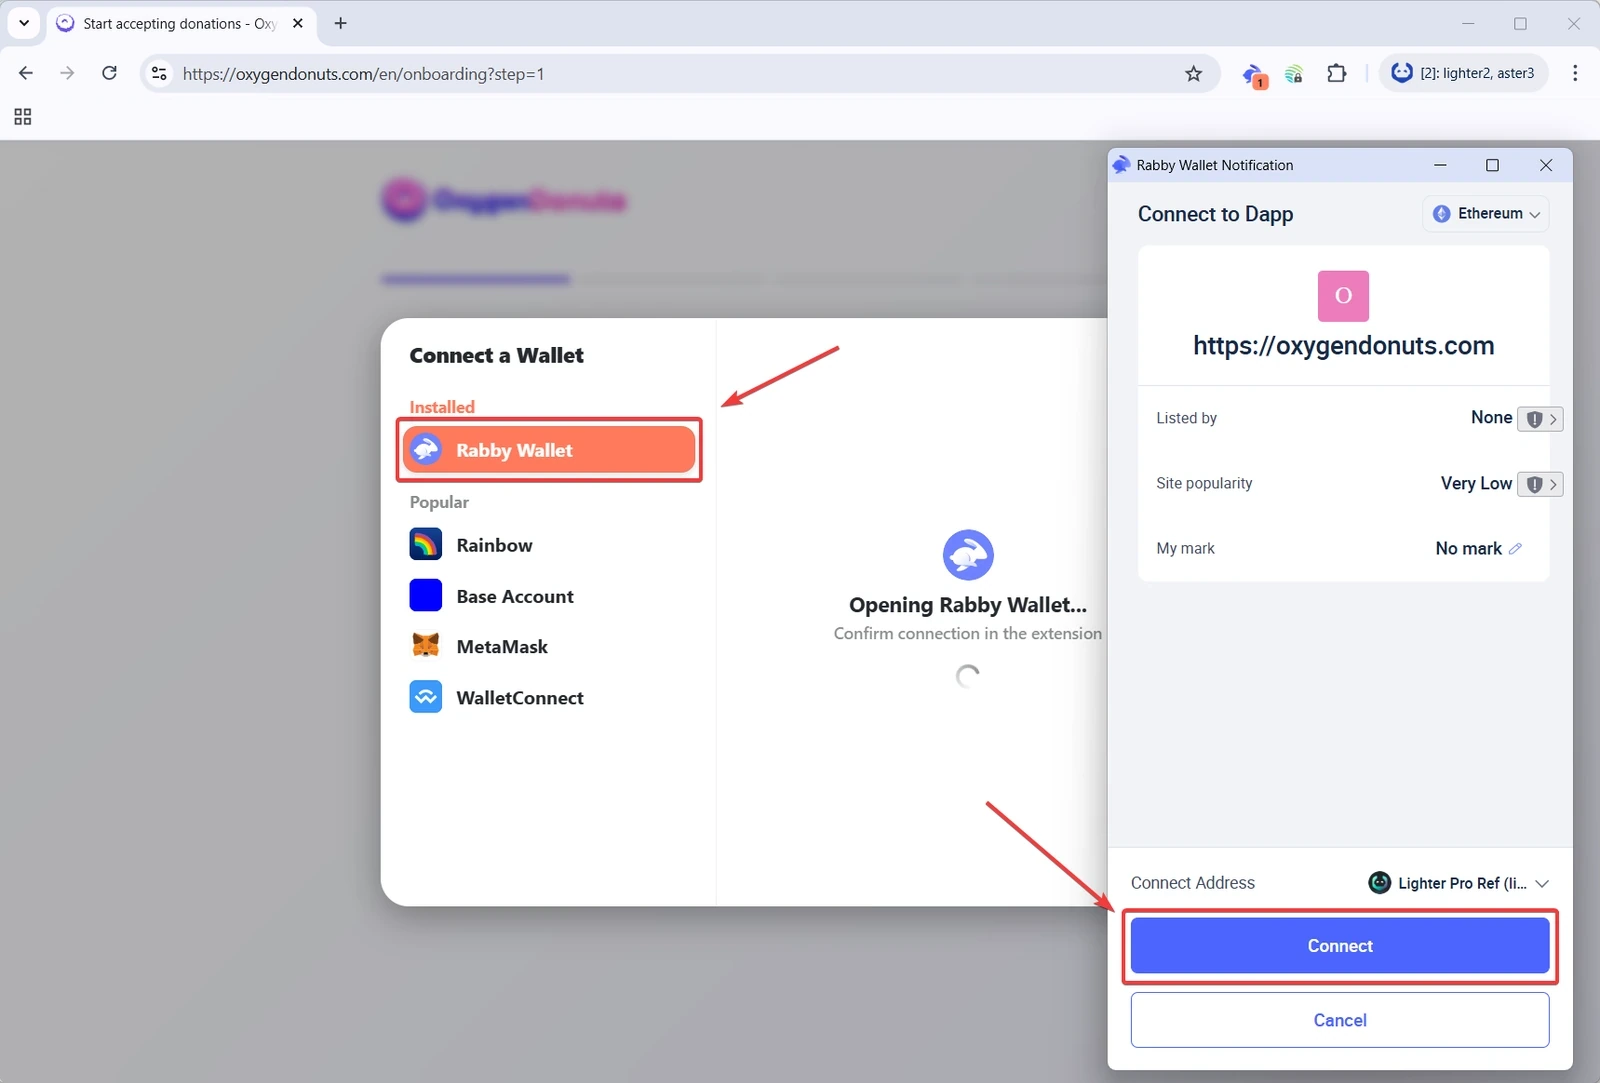
Step 7. Connect the wallet to Oxygen Donuts
Once Rabby is ready, return to the crypto donation setup in Oxygen Donuts. Use the prepared wallet wherever the service asks you to connect a wallet or enter the address that should receive donations.
Checklist before your first stream
Check before publishing the link
- 1Rabby was installed from the official source
Check the extension URL and avoid copies from ads.
- 2Recovery phrase is stored offline
Nobody except you has access to it.
- 3Address was copied correctly
Check the first and last characters after pasting.
- 4Network and token match
If you expect USDT on a specific EVM network, the donor must send it on that same network.
- 5Test transfer worked
Do not collect donations on stream until you have tested a small amount.
- Is Rabby Wallet an exchange?
- No. Rabby is a self-custody wallet. It helps you hold keys, connect to websites, and sign transactions, but it does not replace an exchange.
- Can I receive any crypto through Rabby?
- This guide is about Ethereum and EVM networks. For donations, use only the networks and tokens supported by your Oxygen Donuts setup and understood by the sender.
- Should I show my wallet address to viewers?
- A public address can receive a transfer. But if you accept donations through Oxygen Donuts, it is better to give viewers the donation link so the donation appears correctly in alerts.
- What if the donation does not arrive?
- First check the network, address, tx hash, and balance in Rabby. If the wrong network or address was used, the issue may not be in Oxygen Donuts.
- Should I use a hardware wallet?
- For larger amounts, that is a sensible next step. Rabby lists hardware wallet support, but you can start with a normal setup and a small test transfer.